Air layering is one of the most reliable methods of propagating guava plants, especially if you want faster results and true-to-type plants. In this farming experiment, we tested three different rooting mediums to find out which material gives the best root development in guava air layering.
This step-by-step tutorial explains the complete process, materials used, observations and final results.
Why Air Layering Is Ideal for Guava Plants
- Produces true-to-parent plants
- Faster rooting compared to seed propagation
- Higher success rate than cuttings
- Ideal for home gardens and commercial nurseries
Best Season for Guava Air Layering
- ✅ Spring and Summer – warm and humid conditions promote root growth
- ❌ Winter and late fall – slow rooting and higher failure chances
Tip: If done in winter, rooting may take 45–60 days instead of one month.
Selection of Guava Tree and Branch
Before starting, select the right plant material:
- Guava tree age: 2–3 years
- Choose a healthy branch (pencil-thick or slightly thicker)
- Prefer branches with good sunlight exposure
- Avoid diseased or weak branches
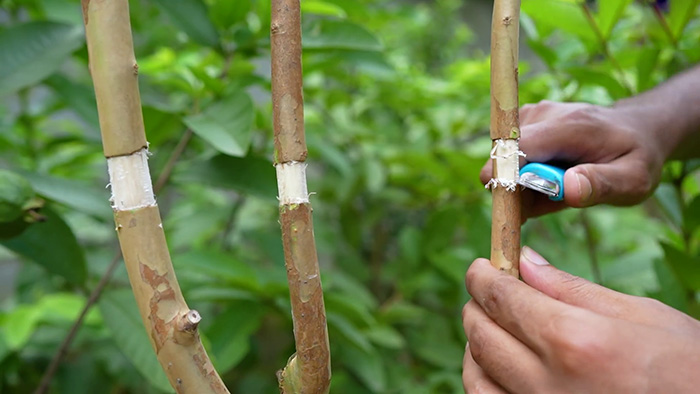
Step 1: Making the Ring Cut (Girdling)
- Use a sharp, clean knife
- Make a ring-shaped cut (1–2 inches long)
- Remove the bark completely
- Scrape off the green cambium layer gently
(This prevents the bark from rejoining)
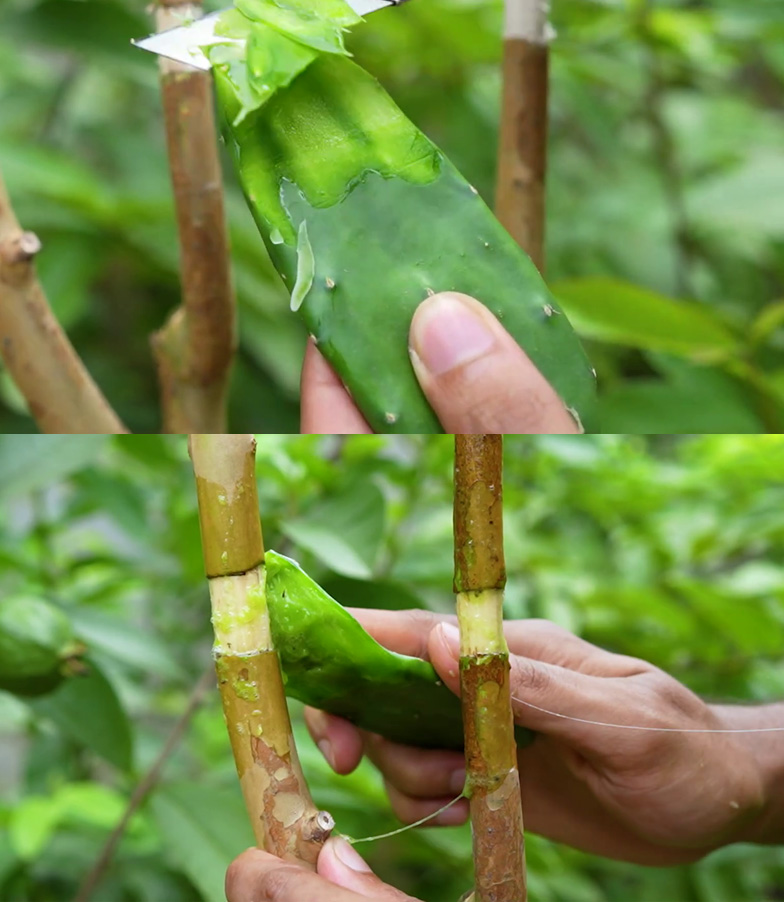
Step 2: Applying Natural Rooting Hormone (Cactus / Aloe Vera)
Why Edible Cactus Is Used
- Natural antifungal & antibacterial properties
- Keeps the exposed area hydrated
- Acts as a natural rooting stimulant
- Protects against fungal infection
How to Apply
- Take an edible cactus
- Peel off the thin outer layer
- Apply directly to the exposed cambium
🔁 Alternative: Aloe vera gel (if cactus is unavailable)
Step 3: Setting Up the Air Layering Cup
- Make a hole at the bottom of the cup (branch size)
- Cut one side of the cup vertically
- Fix it around the girdled area
- Seal tightly using tape
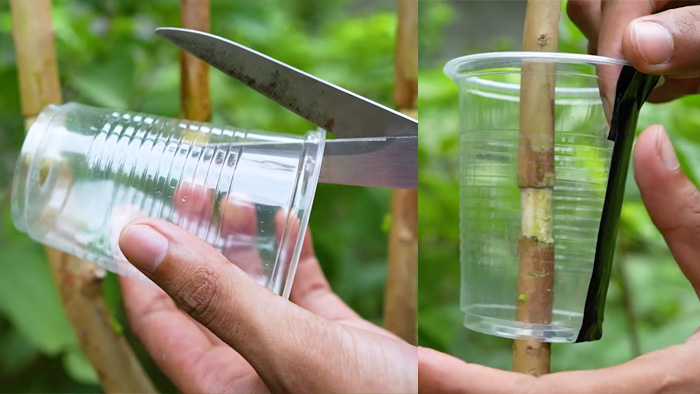
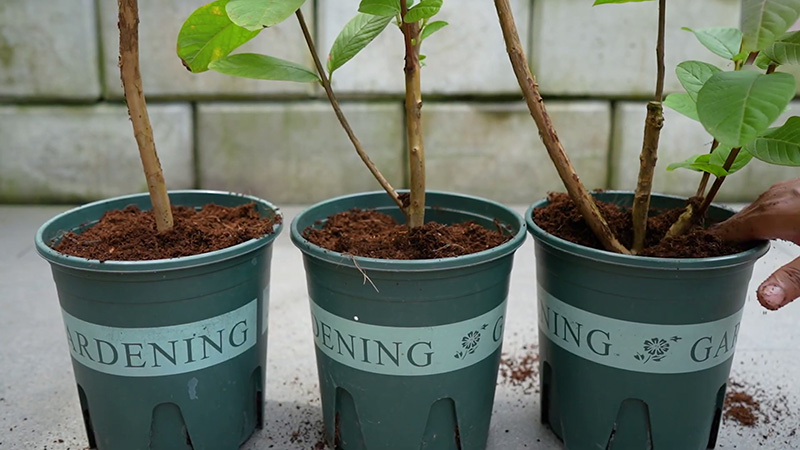
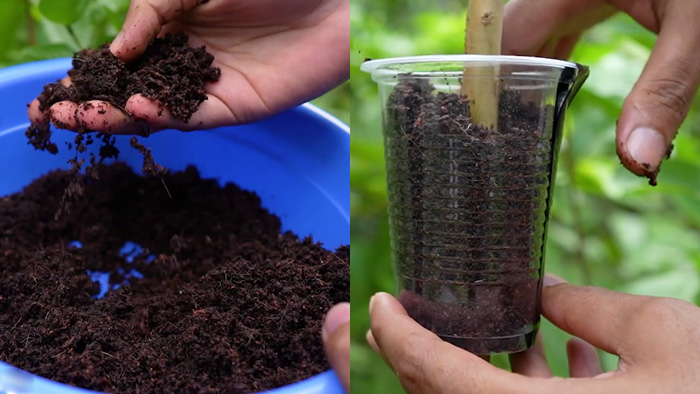
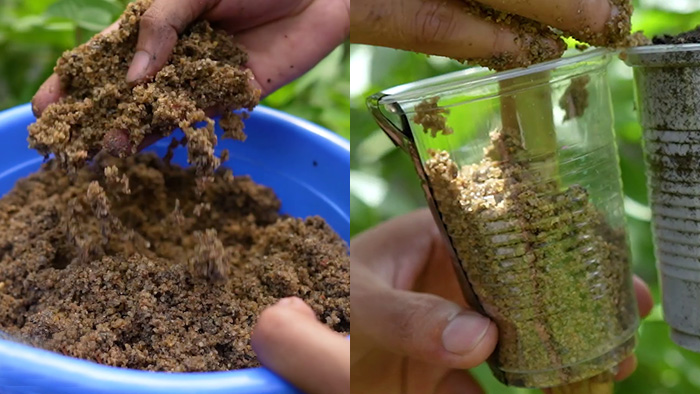
Step 4: Rooting Media Used in the Experiment
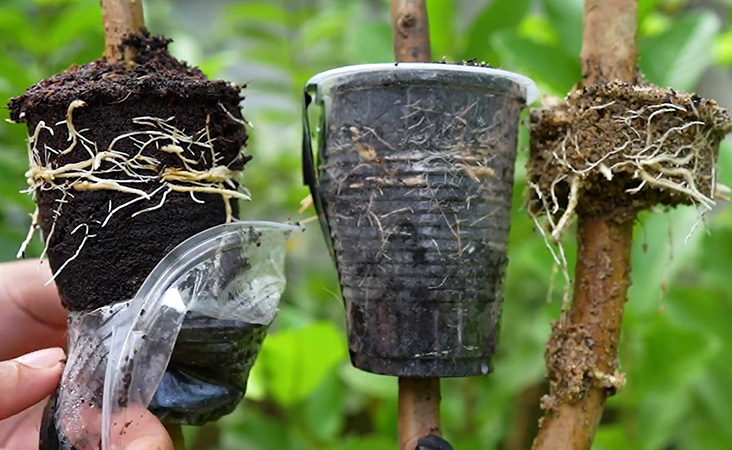
To identify the best medium for guava air layering, three different materials were tested:
Step 5: Watering and Covering
- Water each cup thoroughly
- Maintain moisture:
- Once a week (normal climate)
- Twice a week (hot weather)
Covering the Layer
- Wrap with black polythene or aluminum foil
- Benefits:
- Blocks sunlight
- Maintains humidity
- Encourages root growth
- Secure using a zip tie
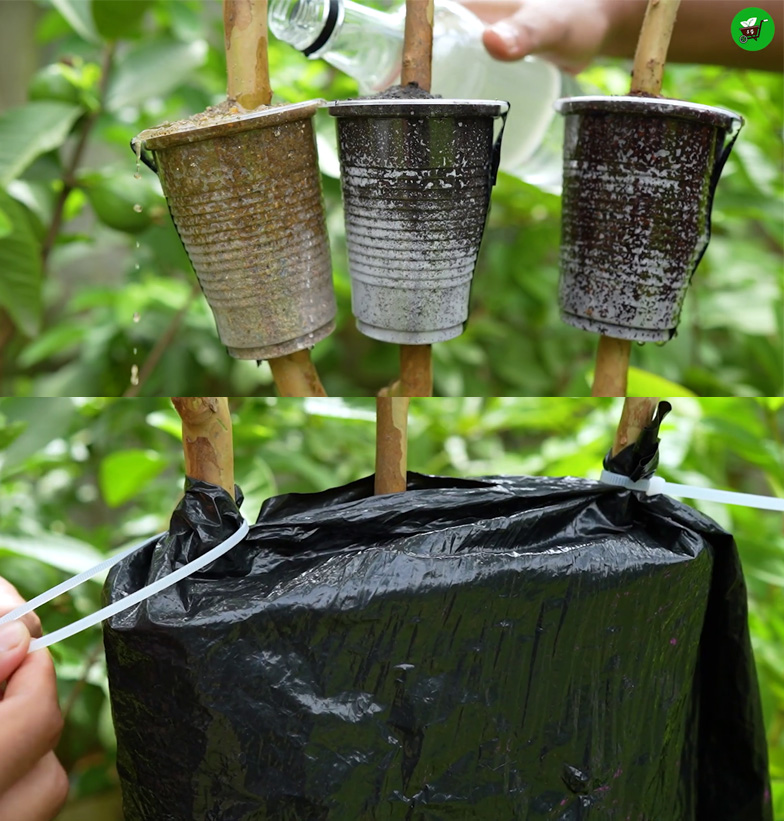
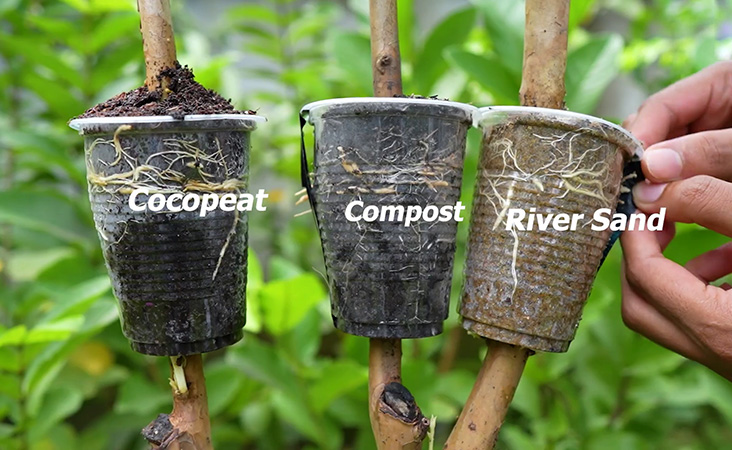
Step 6: Root Development & Observation
- Roots start forming in 30–45 days
- Ideal root color:
- Light tan or yellowish
- Roots should be clearly visible through the cup
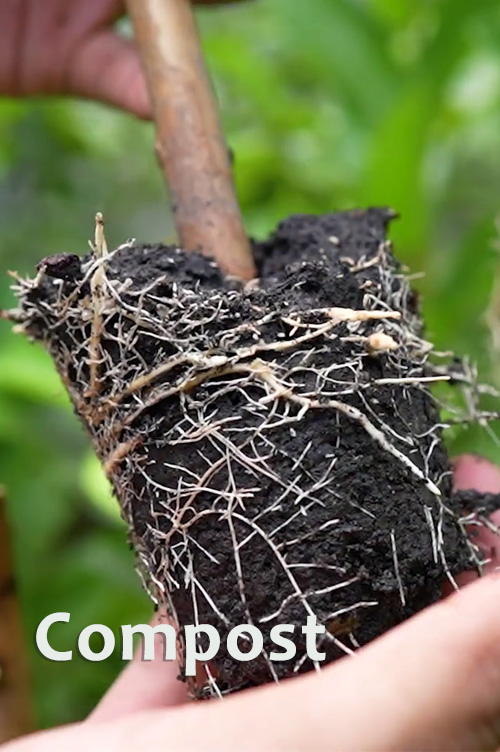
Experiment Result Summary


| Medium | Root Growth | Performance |
|---|---|---|
| Coco Peat | Excellent | ⭐ Best |
| Compost | Good | ⭐⭐ |
| River Sand | Moderate | ⭐⭐⭐ |
Step 7: Separating the Layered Branch
- Remove the cup very carefully
- Roots are soft and fragile
- Cut below the rooted portion using a sharp pruner
⏰ Best time: Early morning or cloudy day
Step 8: Potting the New Guava Plant
- Use well-draining potting mix
- Ensure roots are fully covered
- Water thoroughly after planting
- Keep soil moist (not soggy)
- Place in bright, indirect sunlight
- Avoid direct sun for the first few weeks